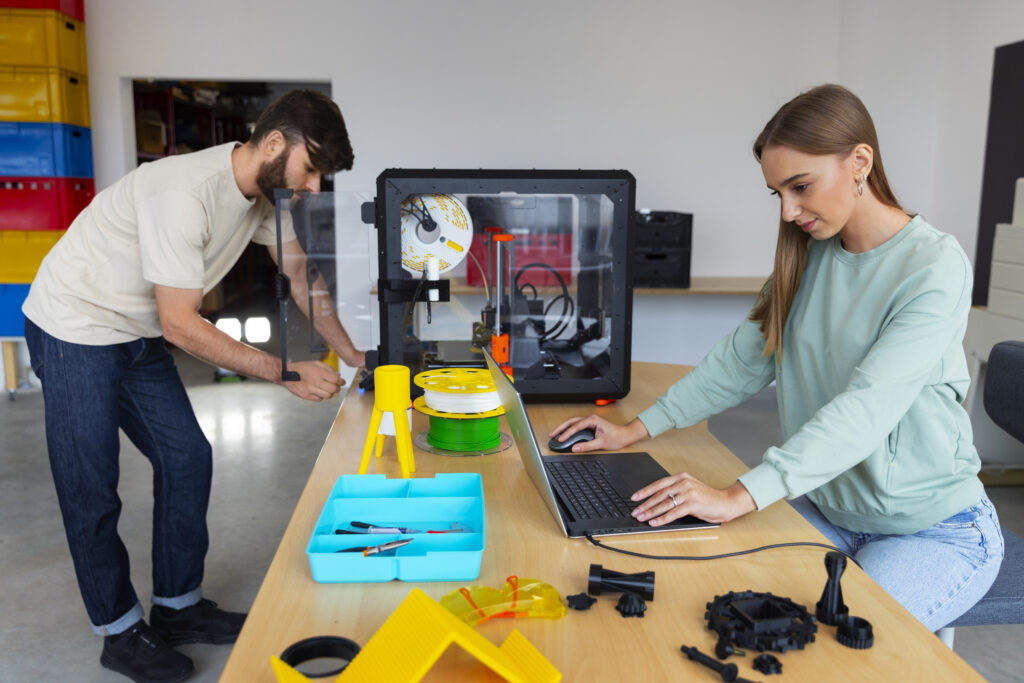
“Your journey into a community of 3D printing enthusiasts begins now”
Whether you got inspired after watching the Netflix documentary “Print the Legend” or came across the term 3D printing when finding for ways to get your ideas into a physical object. Or if you are a hobbyist with a knack for making DIY drones. Or just took a page from the cool dudes book after seeing their Instagram account post of a machine.
“So cool it made physical objects out of nothing, giving even Houdini a run for his money.”
3D printing technologies has been around for more than three decades. It has been evolving with time into different approaches and technologies using varied forms of 3D printing materials such as Plastics, Resins, etc. They are all focused on one thing, to push the boundaries of development.
Did you know? 3D printing enables you to Rapidly Prototype your idea into a physical object. Right from your desktop to your table. This process is referred as “Rapid Prototyping” in the industry.
So, Will we call 3D printing a manufacturing tool or a prototyping tool?
How about both ! 3D Printing has enabled companies to produce complex geometries of parts. Some of which earlier wouldn’t have been possible with the commonly available manufacturing processes.
It is a tool that now empowers designers, enthusiasts & makers to test their ideas, the only limit being their imagination.
There are many guides available that talk about 3D Printing. Our focus is to explain how to get into the 3D printing industry and provide you with paths for further exploration.
By the end of this article, you will have a clear understanding of how to begin with 3D Printing and where to go next. So whether you want to just get familiar with the process of 3D Printing or actually get your hands on a 3D Printer and start tinkering, read below and empower yourself.
PART 1 : Getting Familiar with the Tool
Hello World of 3D Printing
As 3D printing generally is a broader term, we are going to focus mainly on the most widely used 3D Printing technology known as Fused Deposition Modelling or “FDM”, a term trademarked by Stratasys also industrially known as Fused Filament Fabrication or “FFF”. FDM/ FFF 3D Printers are generally where many beginners start and our advice for you would be to start here as well and then as with experience branch along to other technologies.
Additive Manufacturing, a more widely accepted term for the process that FDM 3D printers use, is simply a process where a “tool” such as the FDM 3D printer lays down layers of melted plastics (Filament) one on top of the other, thus converting a 2D Dimensional outline into a 3D dimensional object. Compared to other manufacturing processes which use subtractive methods such as CNC machines where materials such as Aluminium are chipped away layer by layer to create the desired shape.
To further understand additive manufacturing, let’s look at the Tool in detail. A 3D printer works on the principle of XYZ coordinate systems where XY is your Left-Right, Front-Back movements and Z is your Up-Down movement.
_______________________________________________________________________________________________
Article that might interest you: Choosing the right 3D printing material: The ultimate 3D printing material guide
_______________________________________________________________________________________________
The parts include thus are:
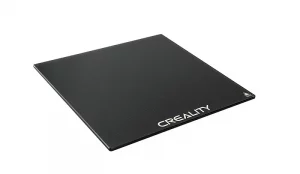
Build Surface which is the surface on which the molten filament is laid down. The build surface is heated to stick the filament to the surface. We do this in order to create a strong foundation for the printing process.
“Don’t worry this does not stick your prints on it permanently and prints can be easily pushed away from it”.
The build surface is generally operated at a temperature of 60-100 degrees. This depends on the material and surface. Commonly used surfaces are glass beds, aluminium beds.
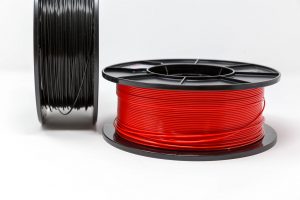
Filament, which is the raw material used to convert your CAD file into a 3-dimensional physical object, can be made up of materials such as PLA, ABS, PET or PET-G, TPU, NYLON and more. You can learn more about the materials from our materials guide.

Extruder is one of the crucial parts of the 3D Printer, it is used to push the filament into the hotend in a controlled manner to make sure the exact amount of filament is pushed through the nozzle at any given point to maintain print consistency and flow of the molten material. It is controlled via a stepper motor or servo motor and is continuous in action during a printing process.
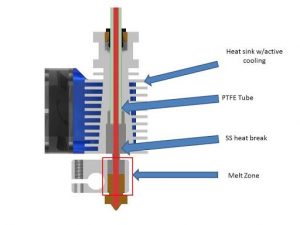
Hot-end can be a decisive factor of the printer; it is a core component which enables you to print various materials. Hot Ends are purpose built and each with their own limitations, they can reach a very high temperature as high as 450 degrees to help you print materials such as Nylon.
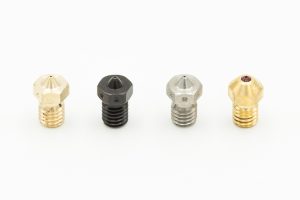
Nozzle apart from being the component that helps put down the filament in the desired shape, also focuses on bringing out the quality of your print. Smaller nozzles allow you to print in finner layer lines bringing out more improved quality of your print. Larger nozzles lay down thicker layer lines useful with larger component sizes.
PART 2: PREPARING THE CAD FILE
Now that we have said our hello to the 3D Printer, let’s now see the process in action. The process can be broken down into two steps one is the Digital aspect and the 2nd being the Print in itself. Let’s begin with generating our 3D Digital file.
Generating the CAD File:
A 3D Printer relies on humans to tell it what it needs to print. Maybe in the future, we might have such technologies. Technologies that would be able to decide what to print as per needs. Automatically it will print and process it for us.
Until we attain this future scenario let’s stick with DIY. Developing what to print with a better understanding of our requirements.
The process begins with an idea. Then translate that idea into a 3-dimensional model, CAD or Computer Aided Design model. To generate a CAD design you would first need a 2-dimensional blueprint. After which we need a sketch to help you visualize. We need to visualise the different orthographic faces of your 3-dimensional object.
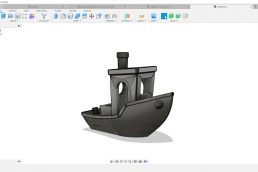
Then we use specialized 3D modeling softwares. Software such as Autodesk Fusion 360 or Rhino or Blender to create a CAD model. CAD model is a step before printing. It helps you visualize your idea virtually and make changes. The CAD model is also developed true to scale.
Sourcing CAD FILES:
Alternatively, maybe you are not a 3D Modeller (a person who makes CAD models). Yet you want to 3D print some props. May be from your favourite movie or gifts for family members.
Example, lets say IPL is on and your best friend is a big fan of M.S. Dhoni, you can come to 3D Printing Company like Alt Innovate. They will create the design and get 3D printed Model for you. With Alt Innovate get your ideas to reality.
If you wish to do a DIY, then we suggest you to pick up a 3D modelling course over your next holiday to help you with the 3D Printing process, a good starting point is to source 3D CAD files.
Thankfully, 3D print as a whole is a huge community. There are many open source platforms that host of 3D printing files. These files shared by 3D printing enthusiasts all over the world. You can download and convert into G-Code and begin printing. We have listed the best ones below:
- Thingiverse – www.thingiverse.com
- Cults3D
- MyMiniFactory
- Prusa Research
- CGTrader
- Grab Cad
What is a G-Code?
Just as computers use assembly language to function. Assembly Language is basically a set of 1’s & 0’s binary. This is used to create a set of instructions. G-Code is machine code, a set of instructions that 3D printers use.
We will learn more on how to set up a G-Code in Part 3. The important bit is to learn that G-codes are a set of instructions for your 3D Printer.
Unlike us humans machines don’t read alphabets. They read G-Codes which tells them when to move and how fast to move. It also guides which axis should it move in. It contains the layer-by-layer instructions for the
- printer
- Speed
- Acceleration
- when to start
- when to stop
- height of the layer
And countless other settings which helps your 3D Printer to print your CAD Model.
PART 3: PREPARING TO PRINT
Step 1: Saving your CAD file
To print your first CAD model, you need to save your CAD Model in the file format: STL. STL files are readable via the majority of the popular available slicing softwares in the market. Let’s learn about slicing softwares in Step 2.
Step 2: Let’s make your first G-Code
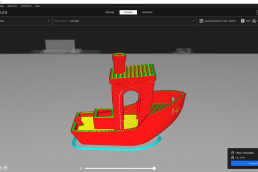
As we learnt earlier G-Code is machine-executable instructions. G-codes are prepared with the help of a slicing software. Slicing software is nothing but the software used to cut your CAD model. CAD Model is cut into fine individual layers. They are then executed by your 3D Printer. Printing one layer at a time in an additive manner.
To slice your CAD model, import your newly saved STL file in popular slicing software. Software such as CURA, PRUSA SLICER, Simplify 3D. These are some beginner friendly tools. You are then introduced to a host of settings. These settings can be further fine tuned to your need. Some commonly adapted settings are:
Layer Height: The lower the value (Ex: 0.1 layer height) more detailed the print. This would be at an expense of a higher print time. The higher the value (Ex: 0.24 or even 0.28) the more you lose resolution. But it decreases your overall print time.
Infill percentage/ Type: This setting is used to impact the strength of your print. A higher infill value will not only increase the weight of your print but also enhance the strength. The lower infill value will reduce the overall strength. This saves you some weight and print time.
Print Speed: Print speed is basically nothing but how fast you want your print to go. A nominal value of 50-60 mm/s is set at default. For a novice user we would recommend not to fiddle around much. Until you have spent some time printing. Then slowly experiment with the print settings.
Support: A crucial setting when printing objects with Overhangs. By now I am sure you have understood the additive manufacturing process. So you know printers need a base layer to print the next layer. It won’t print in mid-air. Hence, when you have prints with overhangs you need to use supports. These supports act as a support to the layer hanging away from the base. Thus, enabling it to be printed without any issue.
You can learn more about these in our 3D Printer Slicing guide.
Next Steps
Once you have adjusted the settings well. Lets slice the file and prepare a machine executable G-Code. Hit the magic button on your slicing software which would read something like “Slice Now”. Now wait for the slicing to be completed.
Once the slicing is complete the software will show you the print time. Layer dissection and an option to transfer your G-Code file into a readable memory drive.
You can now connect your memory card which came with your printer to your desktop or laptop. This will allow you to transfer the G-Code file to it. Next up let’s print our first file.
*There could be instances where your printer size is smaller compared to your model and won’t accommodate the entire model in one print, a good practice is to bring your model apart in smaller pieces and weld or glue the pieces together later.
PART 4: LET’S PRINT
Now that we have completed step 2, and prepared our Model, sliced it and generated the G-Code, it’s now time we go ahead and Print.
Prep for Printing
Before we hit the “Start Print” button we need to prep our printer to make sure we achieve the best print output, some of these are repetitive tasks and some tasks are more related to your printer management.
As for this guide, we are using FDM machines, we will explain the prep portion by using the most generally purposed used filament “PLA”. PLA is most commonly used for quick prototyping as an initial test before making a final print in say ABS, PET/ PET-G, or something else.
Step 1:
Let’s turn on our machines and depending on the machine you are using navigate to the Control setting, you should find an option with the Label “Temperature” in there. Now we begin to prime our Hotend to 200c degree, next within the same menu you should find the option to heat up your build surface, set it at 60 c degrees. These are generic settings used with most PLA Filaments.
*Please note that Hot End Temperature and Build Surface(Bed) temperature would change based on what kind of filament you are using, many manufacturers have their recommended filament settings mentioned on their packaging, so do make sure to check that and follow until you have gained enough experience tweak the settings by yourself.
Step 2:
While your hot end is getting primed and reaching the set temperature let’s go ahead and load the filament into the machine. Get the filament out of the box and find the open end. Make sure to not let the filament go lose from the spool (Spool is on which the filament is wrapped around).
Now find the open end and using a cutter tool, probably provided with your 3D Printer tool kit. Cut the end in an angle, this will help the filament to pass through the extruder much more easily.
Enter the filament through the extruder open end and make it pass through to the coupler all the way into the hot end, (pro-tip you can also pull the extruder lever and push the filament all the way in or turn the knob on the extruder), once done, mount the spool on the spool holder. When the hot-end reaches its set temperature you would soon see the molten PLA ooze out of the Nozzle.
*A hot tip for everyone, based on a personal experience, once you cut the filament in an angle before putting it through the extruder, twist it slightly so when the filament passes through it aligns with the coupler end of the extruder.
Step 3:
Give your bed a wipe, it’s a good practice to give your bed a clean wipe either with soap water, or surface cleaner. Just spray some onto the build surface and wipe it away with a cotton cloth or paper towels. At this point, depending on the print surface if it’s coarse or smooth you might want to put an adhesive on your build surface.
Generally, for a small size print on a coarse surface, you should do just fine without an adhesive. But it is a good practice to use an adhesive just to be safe with larger prints or longer duration prints. This keeps the print stuck to the bed. It will also help you in case of a power failure your bed loses temperature the adhesive will help with keeping it in place.
Step 4:
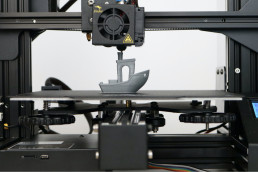
Let’s go ahead and print. Insert the Memory Card in which you just loaded your G-Code and navigate to the Print section in your menu. Discover the file name with the G-Code, and select.
Now all you need to do is stand back and watch the printer do its magic.
Once the print begins there is nothing much you can do. But here are some of our Pro-Tips
- Make sure to monitor the very first layer of your print, this is the foundation layer and makes or breaks your print.
- Are the lines faint? Could be your nozzle is too close to the bed, change the offset.
- Signs to look for, is your printer under-extruding / over-extruding? You might find gaps between your layer lines or blobs on your print
- Constantly monitor to see if your print is running smooth, if you see your nozzle moving but it’s in the air and nothing is coming out of the nozzle. You have hit disaster and your print has failed. Stop the print as it could be a nozzle clog or failure at the extruder end.
You can read more on common 3D Print failures and how to correct them here:
Now, hoping everything went smooth and your print is complete.
Congratulations you just 3D Printed your first. Your life is just about to get a whole lot more interesting. You will soon find your home, workspace filling up with 3D Printed parts, Headphone holders, Check? Phone stand, Check? Custom keychains? Possibilities are endless.
Check Out the Top 10 things to 3D Print: Workspace Management Edition
Welcome to 3D Printing
If you have stuck with us all the way to the end here are some additional tips for you to follow and carry into your 3D Printing process.
- If you find yourself to be printing occasionally, moisture is your enemy! You will soon find your filaments going bad. One of the reasons your print fails is due to poor storage of filament and hence, we advise you to store your filament in a sealed airtight container when not in use.
- Make sure to keep your workspace neat and tidy before and after every print, and keep your tools organized. Trust Us, this will keep you hooked to 3D Printing always.
- Make sure if your printer uses a belt-driven system that you check your bed tension periodically. Too loose and your prints fail, too tight and again your resolution is very poor. Make sure when you tighten your belt you don’t over-tighten it, a nice way to check is to pull down on your belt like strumming a guitar string, a slight vibration is a strong indication of a nicely tightened belt.
- Make sure to check your bed level every 2 weeks or after every 40-60 hours of print for a great print result.
- After every 100 hrs of printing make sure to check all your screws and nuts, continuous use can affect your printer, as well as vibrations from printing, can put stress on the nuts and bolts. It is a good practice to also replace your nozzle at this point as it may wear out. We recommend these as standard brass nozzles are cheap and something you shouldn’t shy away from replacing.
Additionally, now that you have gotten yourself into the 3D printing habit. There will be times when the Raw output of 3D printed parts are not complete for your use and you might want to paint them.
Follow these post procedures steps to attain an even greater quality of print. A quick hack if you are sure you are going to paint your parts, print at a slightly higher layer height to speed up the printing process.
POST-PROCESSING
- Removal of Supports: Many times your prints might use supports as we learned during the slicing process. When your prints are complete, supports are attached to them. They are generally easy to remove. A slight push of your thumb will do the trick or use a “minus” head screwdriver to break the joints apart.
- Sanding: before you proceed with painting, smoothen out those layer lines with a 220-grade sandpaper. Once smooth you can fill the holes and imperfections with the help of putty and sanding a bit more.
- Primer: A good practice would be to primer it and smoothen it out with a 600-800 grade sandpaper. If you need an even higher grade of finish, prime it again and sand with 1000-2000 grit sandpaper. Now we are ready to print. Repeat step 2: putty and sand as and where needed.
- Paint: Get your mask on, clean your print make sure it is dry, mix the colour of your choice and go ahead and print
- Lacquer: You can choose lacquer to protect your painted surface.
Hope the above guide is helpful and you have learned a lot from this, if you did, share this with people who you think might benefit from this.
Print Now with us! Has this article excited you, but don’t own a 3D Printer yet download a file from one of the CAD file sourcing places and send it to us for your first 3D printed file.
Like what you read? Follow us on all our social media platforms to see new and exciting news and updates we have to share with everyone. This is a great way to stay up-to-date with the latest trends and exciting projects we do here at Alt Innovate.